- 1. What does the Google Indexing API do?
- 2. In which cases does it make sense to crawl faster?
- 3. Instructions: How to create projects for the Indexing API
- 4. Step 2: Create a service account.
- 5. Step 3: Verify your website (if you haven't done it)
- 6. This is how you set up the plugin.
- 6.1. This is how you configure the plugin.
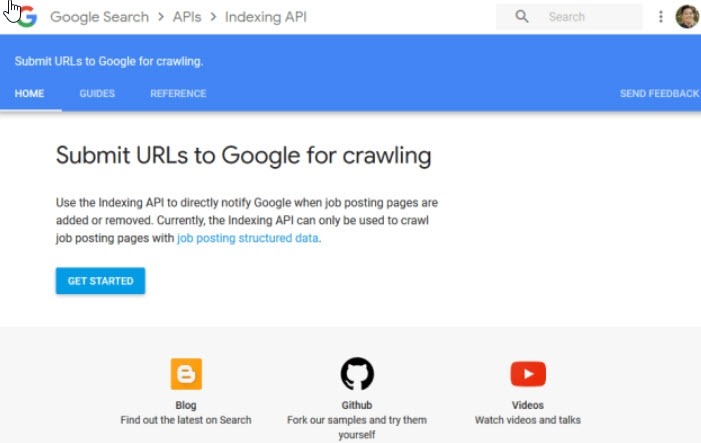
Anyone who has updated a post or wants to spread hot news depends on Google to index the content quickly. However, this can take a while - so you have to wait for traffic and a good ranking first unless you use the Google Indexing API!
What does the Google Indexing API do?
The indexing API from Google gives you three major advantages:
- Your content will rank faster
- This increases your chances of ranking ahead of the competition
- Updated posts are crawled faster
In summary, it can be said that your website and new content rank faster thanks to the API. You're telling Google to index or re-crawl a webpage. You can use this to your advantage and leave the competition behind.
In addition, you can use the API to instruct Google to remove your deleted websites from the index (SERPs). You can also call up the request status. With this, you can check when Google last received a notification about a URL.
By the way, Google recommends using the API only for job searches and live streams. SEO’s quickly found out, however, that the interface is also quite useful for other content.
In which cases does it make sense to crawl faster?
Before you bother to set up the API for your website, you should know in which cases it will be useful for you. The setup is relatively straightforward with our instructions, but it still takes some time.
Spread your news faster
Do you run a news site? Or do you regularly inform your readers about news from your industry? Then you often have to be quick! There was a new development or an important statement that you want to share with your readers as soon as possible. It's just stupid that Google's indexing is a long time coming ...
If you want to distribute the latest news promptly, the API will help you. As you have already learned in the previous chapter, your website will be crawled and indexed faster by Google through the Indexing API.
If this happens much faster for you than your competition, you have done everything right, and you will be able to look forward to a lot of traffic and, in the long term, maybe even more relevance / better rankings.
Updated posts are crawled faster.
You should regularly revise the content on your website. Updating blog posts is critical to provide your readers with current and correct information at all times.
You can use the API so that Google can recognize this change as quickly as possible. With this, the search engine crawls the page faster and records the new content. This can improve your ranking and give you more traffic.
Instructions: How to create projects for the Indexing API
Before you can use the API, you have to activate access to it. For this, you need the Google API Console, with which you can create a corresponding project. Various settings and information on access to the API are then summarized.
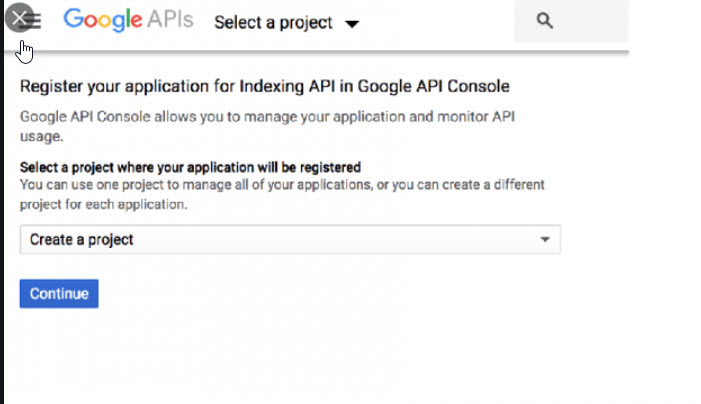
Step 1: Create a project
Such a project can be created quickly - follow this link: console.developers.google.com/flows/enableapi?apiid=indexing.googleapis.com&credential=client_key and select the " Create project. "
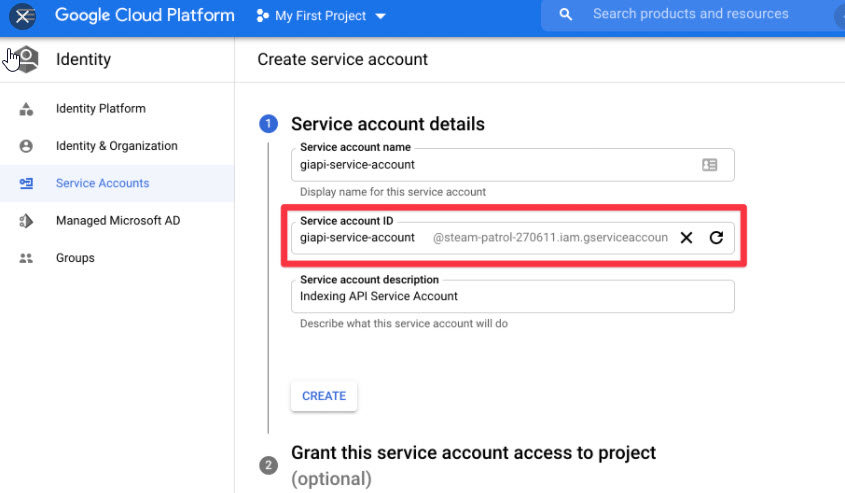
Step 2: Create a service account.
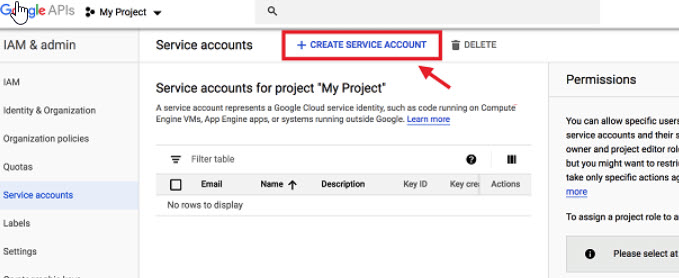
Now enter a name and description for the service account. You can either use the preset ID or create your own number to help you tell your accounts apart. It is best to save the ID separately, as you will need it later.
In the next step, you select a role and click on " Owner. " You then still have the option of granting other users access to this service account.
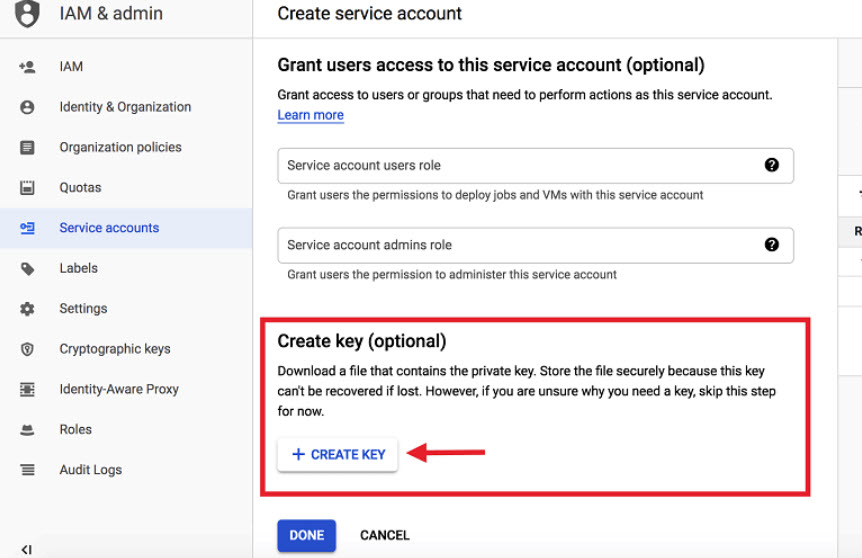
Here you can give users access to the account.
Then click on "Done." Now you can create the API key by clicking on the three little dots under "Actions."
Easily create API keys.
Determine which key type you want to create and click on "create."
Select the key type.
Step 3: Verify your website (if you haven't done it)
You now have to confirm your ownership. If you have already done this, you can go straight to step 4.
Otherwise, open the Google Search Console and select “Properties ” from the drop-down menu and then “ Add property.” Add a "domain property."
If you haven't already, add your property.
You then have to confirm this, which is best to do directly. You will receive a detailed description of the individual confirmation steps. Do this, and you're done.
Step 4: Add the service account as the owner
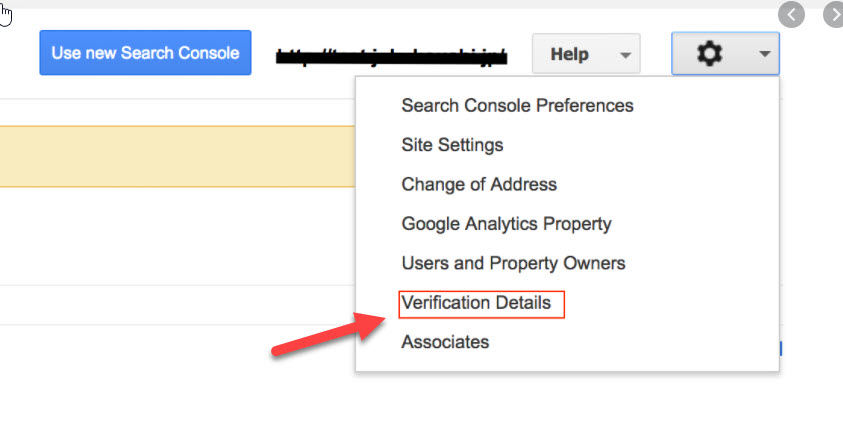
Now open the Google Search Console again and select the confirmed property. Scroll down the menu and select "Settings."
Then click on " Users and Permissions. " Your account will appear: Select the button on the right edge of the screen.
A new tab will open in which you scroll all the way down. Click on "Add Owner." Here you now enter the ID that you should copy or save in step 2.
Then update the first tab - your service account should now be listed as the owner.
This is how you set up the plugin.
If you want to use the indexing API, you can install it like any other plugin on WordPress. It's even completely free.
Download the plugin here: wordpress.org/plugins/fast-indexing-api/
Then open the WordPress dashboard and click on the “Plugins” tab in the left menu. You will then see a blue button " Upload Plugin " at the top. Now you can upload the indexing API plugin in zip format.
This is how you configure the plugin.
Once you have successfully installed the plugin, you still have to configure it. To do this, open the WordPress dashboard and select " Rank Math " in the menu on the left. Rank Math developed the plug-in for the API.
Select the point "Instant Indexing" and then the tab "Settings." Either you enter the content for your JSON file in the upper field or upload it using the button below the field. Below you can specify which content will be crawled by the Indexing API.
Important: Don't forget to save your details with the blue button at the bottom of the page!
Here we go: You can send URLs to the API that are to be indexed directly. To do this, stay in the WordPress dashboard at “RankMath” and select the “Console” tab next to the settings.
Under the heading " Immediate indexing," you will see a large field where you can now insert one or more URLs that are to be indexed. You can enter up to 100 (!) URLs at once.
Below you have the option to define what should be done with the URL:
- To update
- Remove
- Status query
Confirm your entry with the " Send to API " button. After a few seconds, a green tick with the word "Successful" should appear.
As you can see, it is not that difficult to send instructions to the Indexing API. The result will be clearly noticeable - especially if you want to spread the news or update your blog posts. In both cases, we advise you to work with the API for the best possible results.
Get ahead of your competition!
With the Indexing API you have in your hands, you will quickly crawl new or updated entries. Once the plugin is set up, you can send requests to Google with just a few clicks. So you are always one step ahead of your competition and provide your readers with new content much faster. Let us know if our guide has helped you. I wish you success!